
Need to repot your plants but have no idea how? We know re-potting can be something difficult to do because so many things could go wrong, your plants can get damaged, dry up, or die in the process. It's crucial you know what you are doing when it comes to re-potting a plant, and that's why we made you this how to repot a plant guide to help you achieve this task successfully!
Before we get into this guide on how to repot a plant, let’s take a look at the reasons why re-potting is so important for your plant's health and when re-potting is actually needed. This guide applies to all types of plants including indoor plants and outdoor plants.
Why it's Important to Repot Plants:
- After some time of being planted your plants needs to be re-potted, and this is because plants tend to outgrow their pots and start to look saggy and tired. It's a must to repot your plants in a bigger pot.
- Changing the soil is an important part of re-potting because fresh potting soil means new and proper nutrients for the plant. Diseases, mold, and pests often tend to affect potted plants and changing the soil can prevent this from happening.
- A bigger pot means more space and your plant will love this. Your plant's roots system will have more space to grow successfully. The root ball of your plant should always have plenty of space to be able to spread around.
When to Repot:
The time to repot depends on many factors but the most important one is in the kind of plant you want to repot. Most plants need to be re-potted once a year but others kinds of plants have different needs. Let's take a look at this chart of when to repot some of the most popular houseplants and outdoors plants:
| HOUSEPLANTS | WHEN TO REPOT |
| Spider Plants | When roots start showing above the pot |
| Aloe Vera | When the plant start reproducing |
| Jade Plants | Young plants every 2-3 years and older plants every 4-5 years in spring. |
| Peace Lily | When the plant is rootbound. |
| Moth Orchids | Every two years after flowering. |
| OUTDOOR PLANTS | WHEN TO REPOT |
| Hydrangeas | Every 1 to 2 years |
| Eucalyptus | Every 2 to 3 years in spring |
| Hibiscus | In spring or early summer |
| Catnip | In early spring |
| Salvia | Every 3 years in early spring |
| Lavander | Once a year in late winter or early spring |
| Shasta Daisies | Early fall after flowering |
Important fact: You should always repot your plants after purchasing. Nursery pots are usually too small and the plant is ready to be moved to a bigger pot.
How to Repot a Plant
Don't feel like reading right now? Check out this instructional video courtesy of ThisIsAPlant YouTube channel! When it's time to repot your plants there are a few things you need to get your hands on:
You'll need:
- A larger pot than your previous one with good draining holes.
- A trowel
- Gloves
- Potting mix – choose a potting mix suited for your specific plant.
- A watering can or spray bottle
- Knife or scissors – optional
- Coffee filters or paper towel
Step 1: Water your Plants Before Re-potting
2 or 3 days before re-potting, water your plants well. This will help with the process since the soil will be moist and manageable. You can also moist the new soil in case it feels dry. Of course, this is only when needed.
Step 2: Get a Bigger Pot
One of the reasons for re-potting is to change the pot because the plant has outgrown it. Choose a larger pot than your previous one making sure that it's not only larger but also deeper. The kind of pot you need to get will depend on your plant so do a little research about your plant beforehand. A pot with good draining holes is also something very important. This will guarantee that your plants won't be rotting or sit in water.
Step 3: Cover the Drainage Holes of your Pot
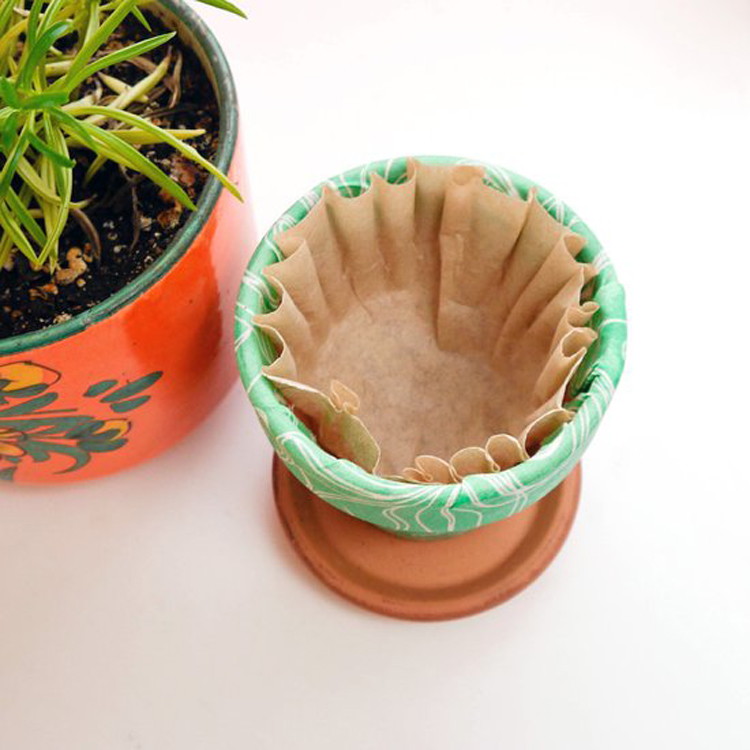
While having good drainage holes is important, it's also as important to make sure your soil doesn't come out through them. We only need the water coming out and to achieve this, cover the draining holes with something like coffee filters or paper towels.
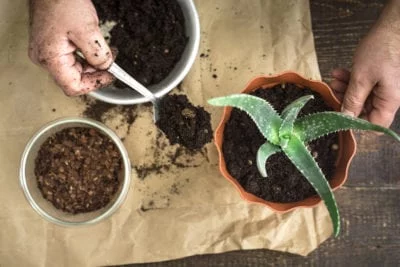
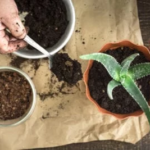
Step 4: Place a Layer of New Soil in the New Pot
Pour enough soil so the roots have enough space to grow into but be careful not to fill in too much. If roots are growing outside of the pot, you need a bigger pot! We don't want the roots to spill over the top.
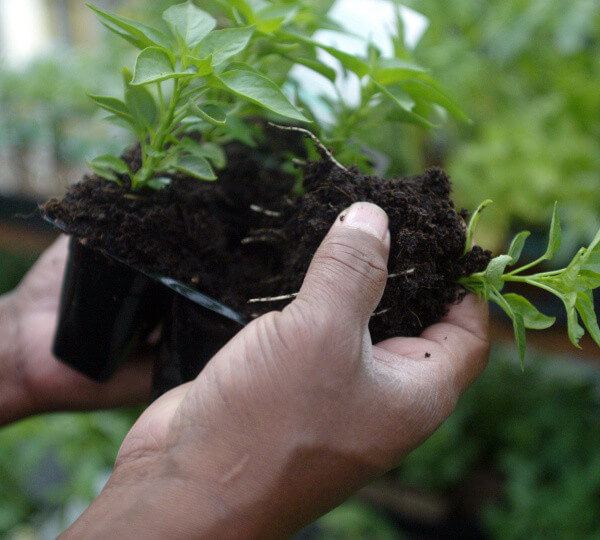
Step 5: Remove the Plant from the Old Pot
This is the most nerve-wracking step when it comes to re-potting because if we are not careful enough we can damage our plants. To prevent damage and successfully remove the plant from its old pot, place your hands at the top of the pot then turn the pot upside down. Gently move the plant side to side so it gets loosened and falls out of the pot. This is why watering the plant before re-potting it's a great tip. It will make everything easier.
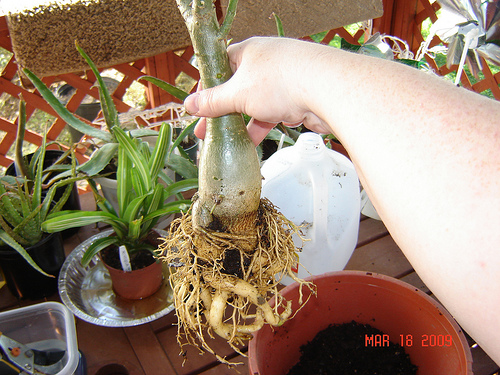
Step 6: Prepare the Root Ball
Before placing the plant into the new pot, check the root ball and if needed prune the old roots to help uncover the new ones. After pruning, untangle the roots to encourage them to grow outward and have better contact with the soil.
Step 7: Set the Plant in the New Pot
Gently place the plant into the new pot making sure it's centered. Look carefully into all angles so the plant it's not placed too close to the sides. After placing the plant into the new pot, fill the pot with soil around the root ball making sure not to fill the pot completely. Let about 1” below the top. You can press into the soil after filling or just fill normally.
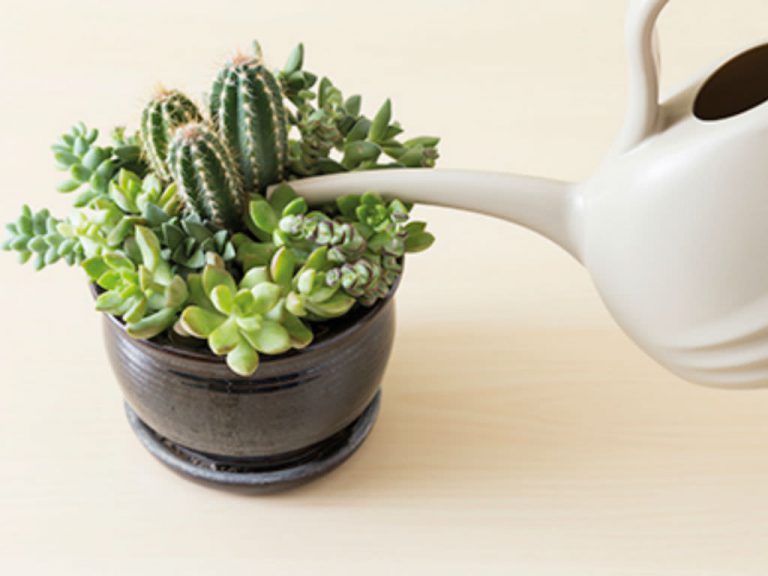
Step 8: Water your Freshly Repoted Plant
After placing the plant in its new soil and pot, water well to encourage the plant to soak in the nutrients in the new soil. It's important that you know that after re-potting, it's not recommended to apply any fertilizer or move the pot outside to direct sunlight. Now that you know how to properly repot a plant, it's time to get to work!
How to Repot a Plant
Instructions
STEP 1: WATER YOUR PLANTS BEFORE RE-POTTING
- 2 or 3 days before re-potting, water your plants well. This will help with the process since the soil will be moist and manageable. You can also moist the new soil in case it feels dry. Of course, this is only when needed.
STEP 2: GET A BIGGER POT
- One of the reasons for re-potting is to change the pot because the plant has outgrown it. Choose a larger pot than your previous one making sure that it's not only larger but also deeper. The kind of pot you need to get will depend on your plant so do a little research about your plant beforehand. A pot with good draining holes is also something very important. This will guarantee that your plants won't be rotting or sit in water.
STEP 3: COVER THE DRAINAGE HOLES OF YOUR POT
- While having good drainage holes is important, it's also as important to make sure your soil doesn't come out through them. We only need the water coming out and to achieve this, cover the draining holes with something like coffee filters or paper towels.
STEP 4: PLACE A LAYER OF NEW SOIL IN THE NEW POT
- Pour enough soil so the roots have enough space to grow into but be careful not to fill in too much. We don't want the roots to spill over the top.
STEP 5: REMOVE THE PLANT FROM THE OLD POT
- This is the most nerve-wracking step when it comes to re-potting because if we are not careful enough we can damage our plants. To prevent damage and successfully remove the plant from its old pot, place your hands at the top of the pot then turn the pot upside down. Gently move the plant side to side so it gets loosened and falls out of the pot. This is why watering the plant before re-potting it's a great tip. It will make everything easier.
STEP 6: PREPARE THE ROOT BALL
- Before placing the plant into the new pot, check the root ball and if needed prune the old roots to help uncover the new ones. After pruning, untangle the roots to encourage them to grow outward and have better contact with the soil.
STEP 7: SET THE PLANT IN THE NEW POT
- Gently place the plant into the new pot making sure it's centered. Look carefully into all angles so the plant it's not placed too close to the sides. After placing the plant into the new pot, fill the pot with soil around the root ball making sure not to fill the pot completely. Let about 1” below the top. You can press into the soil after filling or just fill normally.
STEP 8: WATER YOUR FRESHLY RE-POTTED PLANT
- After placing the plant in its new soil and pot, water well to encourage the plant to soak in the nutrients in the new soil. It's important that you know that after re-potting, it's not recommended to apply any fertilizer or move the pot outside to direct sunlight.


How do you know when you need to repot a plant?
Hi Liza!
There are a few ways you can tell your plant needs to be re-potted:
#1: You can see the roots growing out of the pot (through the bottom, where the drainage holes are)
#2. The roots are growing and pushing the plant up outside of the pot.
#3. The plant is growing too slowly (because it doesn’t have enough room to spread out)
#4. The plant is very top heavy, and will therefore slump over.
If you see any or all of these signs, it’s time to repot 🙂